Motivation
3D Printing Today
The proliferation of affordable home and open source 3D printers has been followed by an explosion of freely available things to print. Thingiverse is one of the easiest and most friendly place to obtain printable objects, and has boosted the confidence of many designers to create things to print. Most of the popular 3D printers in the affordable and hobby price range have a relatively limited build envelope. The popular Makerbot kits normally on the order of 120x120x120 millimeters, or 210x210x220 millimeters for the impressive Ultimaker kit. To make bigger items, a designer must either design parts that are small enough to fit in the build envelope and assemble them later, or choose not to design things that are bigger than the build envelope. When the small envelope of the Makerbot is the design constraint, then generally the simplistic extruder designs employed at this level are reliable enough to complete most print jobs. If a print does fail, often the part is small enough that the material loss is relatively insignificant.
What I Want Out of My 3d Printing Experience
The Crux of the Matter: I want to print really big stuff.
Really big stuff is a bit vague, so let me expand upon that. I want to print out full size helmet designs, maybe for movie props, such as a Star Wars stormtrooper helmet. I want to print out model airplane designs, with lengths as big as six feet long, and wingspans reaching as wide as eight feet. I want to print out high power rocket parts, such as nosecones that are 8 inches diameter and 3 feet tall, or tailcones with the fins attached reaching footprints of 24×24 inches. I want to print out new headlight bezels and other assorted custom parts and pieces for my car. I want to be able to print these things in as few pieces as possible, some are only feasible if printed in a single piece.
Mean Time Between Failure
Experience with a Makerbot Thing-O-Matic and a Rev 3 Ultimaker have indicated some of the problems with the open source designs, specifically and most alarmingly in the extrusion mechanism. The Mean Time Between Failure (MTBF) of the extrusion tool on these machines is approximately 5 hours. This means that if I print for 100 hours, I can expect 20 extrusion failures. Not all extrusion failures are fatal to the job, but recovery always requires the operator to notice the problem almost immediately and perform a corrective action. For large jobs, this leaves an operator nervously monitoring the extruder for hours, rather than doing something productive while the job is printing. If the job needs to run overnight, monitoring may simply not be an option. Unfortunately, the price of failure both lost time and wasted material. Not a big deal on small parts. but a twelve hour job that fails sometime during the night, but near the end of the job, could be significantly wasteful. By increasing the MTBF, an operator is freed up to do other things while less printable material and machine time is wasted.
Failure Modes
The most common failure for open source printing extruders is full or partial loss of extrusion. Full loss of extrusion occurs for two basic reasons. Either the filament has been stripped and the effective diameter reduced beyond the extruders ability to grip it, or the end of the filament strand has been reached. Partial loss of extrusion generally occurs because the extruder is slipping against the filament, so the software thinks it is pushing more plastic through the extrusion nozzle than it actually is. Partial loss or even excess extrusion can occur because the filament diameter does not have a tight tolerance, and it changes enough to effect the quality of the print.
Design Solution
The biggest issues generally come from lack of instrumentation and open loop control systems, and sometimes also from inadequate design.
Gripping the Filament
The Makerbot Thing-O-Matic’s MK7 Stepstruder and the Ultimaker’s Ultistruder both suffer from a similar design flaw that is relatively easy to fix. I have seen the significant difference between the Makerbot MK7 and the upgraded spring loaded replacement from Thingiverse. For the same reasons, it is easy to see why the Ultistruder MK2 was also uploaded to Thingiverse. The use of a spring loaded pinch mechanism will make the extruder tolerant of filament diameters and increase the likelihood that the extruder can recover from slipping on or stripping out the filament.
Filament Odometer
The favored method for defining filament usage is by defining length of filament consumed, and allowing the Cartesian firmware to adjust the extrusion speed to match the accelerating or decelerating Cartesian velocity. Currently, there is no known open source extruder that measures the filament’s progress; the filament is always assumed to have correctly traveled the specified amount due to the open loop control system. By adding an encoder that measures the filament’s movement, the extruder can automatically calibrate the extrusion rate, which can vary by material. The encoder can also be used as a watchdog to ensure the filament is moving and has not stripped out, restarting the filament in the case of failure.
Diameter Measurement
Filament diameter on a spool is inconsistent enough to affect the print quality. The accepted method is to measure your filament several times over the length of filament you expect to use, then put the average diameter in the model slicing software. The result of adjusting this tends to be fairly good, because the slicing software uses a volumetric calculation to determine the desired length of filament to extrude, but the resulting file is not really reusable. By adapting the extrusion speed on the fly using feedback from a diameter sensor, the part does not need to be re-sliced to account for filament nuances, saving time.
Build Envelope
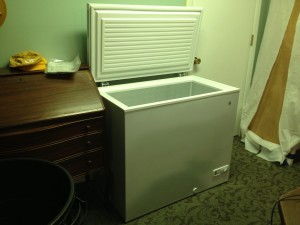
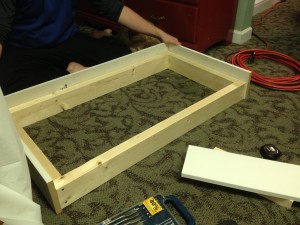
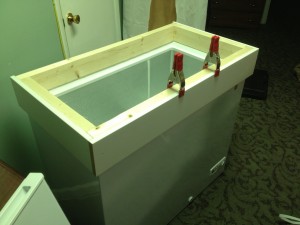
The end goal of making a more reliable extruder is obtain the ability to print very large objects with minimal waste or failed attempts. The goal for this project is to build a 3D printer with a 50 x 50 x 100 centimeter build envelope into an enclosed box. The enclosed box allows for the ability to regulate the temperature of the build environment for increased precision and reliability. The entire project will still need to fit through a standard North American interior door, 32 inches in width.
Filament Reload
Considering the vast volumes that can be printed within the proposed build volume, the probability of running out of filament on a reel becomes quite significant. It is relatively easy to have the printer pause in software and wait for the operator to intervene, but a better alternative for boosting reliability would be to have the extruder automatically changeover to a secondary filament. This would be analogous to having a hot spare in a RAID array: the operator can then replace the spent reel when it is convenient, without increasing the printer’s downtime.
Contingency Plan
The basic plan is to pipeline the acquisition of raw materials as much as possible, by ordering the parts needed for the next step or two while working on the current step. The steps will be carried out approximately in the following order:
- Design and build the mechanical extruder
- Test extruder with prototype/breadboarded electronics
- Design and fabricate extrusion control circuit board
- Design and build Cartesian Robot cabinet
- Write/Integrate firmware such that mainstream open source 3D Printing tools can be used to make things!
