Warning: "continue" targeting switch is equivalent to "break". Did you mean to use "continue 2"? in /home/choste/public_html/press/wp-content/themes/suffusion/functions/media.php on line 669

Warning: "continue" targeting switch is equivalent to "break". Did you mean to use "continue 2"? in /home/choste/public_html/press/wp-content/themes/suffusion/functions/media.php on line 674

Warning: "continue" targeting switch is equivalent to "break". Did you mean to use "continue 2"? in /home/choste/public_html/press/wp-content/themes/suffusion/functions/media.php on line 687

Warning: "continue" targeting switch is equivalent to "break". Did you mean to use "continue 2"? in /home/choste/public_html/press/wp-content/themes/suffusion/functions/media.php on line 692

Warning: "continue" targeting switch is equivalent to "break". Did you mean to use "continue 2"? in /home/choste/public_html/press/wp-content/themes/suffusion/functions/media.php on line 697
2012 November » UnRulyRecursion
Nov 292012
 

First Things First

Get your computer set up to develop properly

1. Get the Android SDK: http://developer.android.com/sdk/index.html

This step can either be completed with the first link, which includes a large bundle of everything you’ll need, or, use the drop-down menus to find other options (for example, if you already have an IDE). Android seems to prefer Eclipse.

2. Install Eclipse Plugin: http://developer.android.com/sdk/installing/installing-adt.html

3. Configure; download a few platforms, I grabbed 4.2 (Jellybean), and 2.2 (Froyo)

Had some trouble with this in Win8, needed to allow more permissions for the folder where it is holding the images and whatnot.

 4. Install Subclipse: http://subclipse.tigris.org/

I installed the 1.8.x Release of Subclipse, which corresponds to Subversion 1.7.x Awesome, now get developing! What, you need more? Read on then!

Notable Links

Main Developer Website – http://developer.android.com/index.html Training Home Page – http://developer.android.com/training/index.html Reference Home Page – http://developer.android.com/reference/packages.html Obligatory Wikipedia Links – Main: http://en.wikipedia.org/wiki/Android_(operating_system) – Version History: http://en.wikipedia.org/wiki/Android_version_history (Useful for figuring out which Android version number goes with which Android Dessert Code Name)

Tutorial – http://www.vogella.com/articles/Android/article.html


Android Application Activity Life Cycle

An important thing to note (and indeed, something central to Android and all apps),  is that the Activity Life Cycle is super important. If you pay no attention to this, your app may not start, may lose data, and even act sporadically. Therefore, study the following diagram, as well as the life cycle as whole.

Note (from O’Reilly): “It is possible for a paused activity to be destroyed as well. For that reason, it is better to do important work, such as saving unsaved data, en route to a paused state rather than a destroyed state.”
 

Here is a set of Lecture Slides that was published online: AndroidLifeCycle

Activity Life Cycle

Or perhaps this illustration from the Reference section will appeal to you better.

Activity Life Cycle

If you prefer O’Reilly (owl), here is a link to an excerpt from Learning Android, which explains the Activity Life Cycle: http://answers.oreilly.com/topic/2692-android-programming-understanding-the-activity-life-cycle/

Documentation and Reference

Reference

Main Page: http://developer.android.com/reference/packages.html Activity Page: http://developer.android.com/reference/android/app/Activity.html

Lessons and Training

Getting Started: http://developer.android.com/training/index.html Building Your First App: http://developer.android.com/training/basics/firstapp/index.html Managing the Activity Lifecycle: http://developer.android.com/training/basics/activity-lifecycle/index.html Invoking Google Applications with Intents: http://developer.android.com/guide/appendix/g-app-intents.html


Random Collection

http://wptrafficanalyzer.in/blog/implementing-horizontal-view-swiping-using-viewpager-and-fragmentpageradapter-in-android/

http://developer.android.com/reference/android/hardware/Camera.html

http://www.vogella.com/articles/AndroidCamera/article.html

http://mobile.tutsplus.com/tutorials/android/android-layout/
Nov 292012
 

Good Morning All,

I wanted to share this with you because I am particularly proud of it (as the Term Paper for my Fall ’12 CS 4001 -Ethics course – 97/100), and I think it is a good read for people who are, or know of people in this situation. The paper discusses possible privacy concerns related to RFID/HID Technology which is being used by a growing number of universities and schools.

-T

CS4001-Assignment-05-TermPaper

Nov 292012
 

UnRulyRecursion evangelists Taylor and Sterling will be participating in the GIT MAD Fall 2012 App-a-Thon in collaboration with Larry. This will be an exciting rush of mobile application development (stretching from Friday, Nov. 30 at 6pm to Saturday, Dec. 1 at 12pm) that will be judged at the end. We are raring to go, with a great idea for an app, willing and capable coders, and prizes looming.

If you are interested in following or seeing our progress, the repo and possibly TRAC will be added below.

Stay tuned to hear how it goes and see the app we build! The event’s webpage is here ( link ).

Nov 292012
 

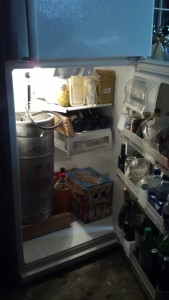
Taylor and I had ideas about building a kegerator to have beer on tap for our 23rd/25th birthday party this year.  The party blew past us, and while we got two kegs, the kegerator did not make it.  The following days after the party, we quickly found we needed to keep the remainder of the beer kegs cold, and ice is not cheap.  First order of business, put the keg where it will stay cold without ice!

Good thing this is the second fridge, in the garage!

So there it sat until Black Friday, when Taylor happened across a chest freezer that happened to fall within our price range.  During the previous week, all the CO2 tap and faucet parts came in mail, in anticipation of actually building a kegerator.

or how I obtained a freezer at the right price on black friday

Chest freezer, on sale!

Building a Collar

When measuring the internal height available in the chest freezer, we found that the tapped keg was about an inch too tall for the freezer.  Fortunately we have the option of building a collar, common practice for chest freezer based kegerators.  This saves us from drilling into the actual freezer, because we can mount the beer faucets in the collar.

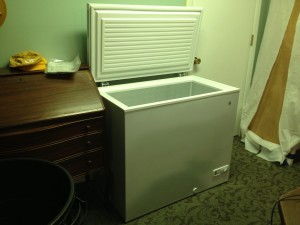
unpacked chest freezer in place

Chest freezer after unboxing at kegerator installation location

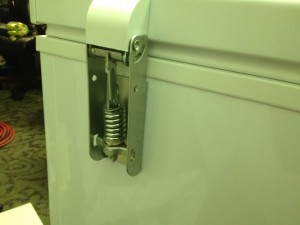
Original hinge installation, after removing the plastic cover

After doing some measuring and hinge investigation, we decided we needed to make a home depot run for supplies.  While at HD, it occurred to us that we could buy the wood for both the frame and the trim of the collar, and get all the wood cut to size at HD.  That way we would not need to cut anything once we got home.  Taylor did some quick calculations and we tapped out all the cut lengths we would need into my phone.

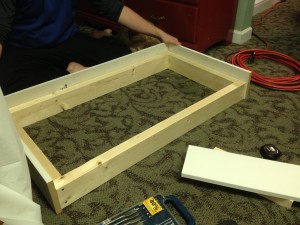
fits like a glove, made out of wood

Test fitting the white outer trim pieces to the collar frame

We did save ourselves the trouble of cutting the wood, but the odd fractional inch sizes were accidentally swapped between the frame length and the trim lengths.  No worries, the collar still fits left to right, and the trim hangs down over the front, but not the back of the freezer.  You can see the inside of the collar in the above picture, where the collar is updside-down and while we test fit the trim pieces.

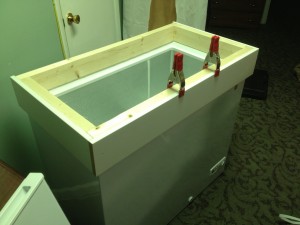
don't want the trim to separate from the frame!

Clamping the trim to the collar frame while the liquid nails sets

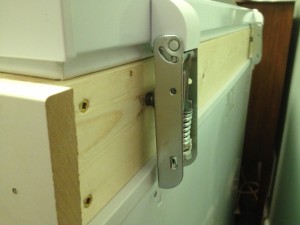
Because the sizes were mixed up, you can see that the back of the collar is not properly flush with the freezer in the picture below.  We decided to use washers to shim up the hinges, and will apply a shim and a retaining piece to the back later.  The retaining piece will make the collar feel more stable because it will not slide forward like it can now.

yet to be shimmed

Lid hinge position, with washers to space it out from the collar frame appropriately

The lid actually would not close properly because of the incorrect dimension.  Quick and easy fix: we used a 45 degree chamfer routing bit to take enough off the back 2×4 to make lid seat properly.

The Results

took long enough

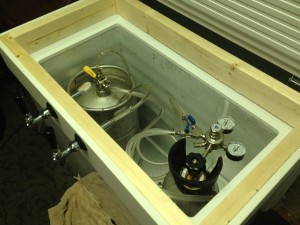
Faucets installed in the collar, and CO2 + Beer in the kegerator

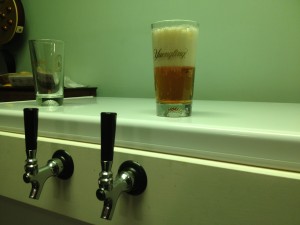
With the collar finally in place and the faucets installed in the collar, its time to pull beer!

BEER!

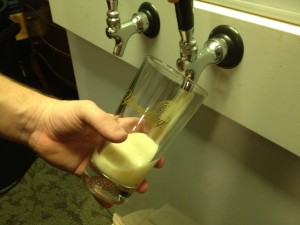
First glass of beer, pulled from the new kegerator

a little foamy yet, but soon to be perfect

First pint drawn from the kegerator, after the pull

ready to pull some beer

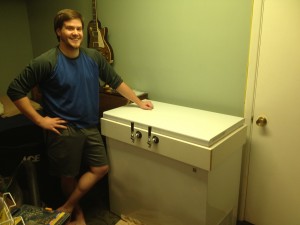
Taylor, a proud craftsman, posing with the fruit of our day’s labor

Future Improvements

  • Add a shimmed retention piece to the back: this will make the collar feel a bit more stable because it will not be able to slide forward.  Fortunately, the current feeling is already pretty stable.
  • Hinge Bottom Plate: by adding a plate that bolts into the original hinge holes, we can ensure that the hinges are properly supported while the lid is being closed.  Currently we just hold them while carefully closing the lid.
  • Temperature Control:  Right now, we just have it set to the warmest setting.  Unfortunately, that freezes the beer.  While the thermostat is still in the mail, we will be turning the freezer on a night, so the beer does not get too warm, and then leaving it off during the day so it will not be frozen when we want to pull beer.